Saturday, 30 May 2015

Outback Odyssey 2015 - Day 3

Mini Mawson 3 - Hawker to Rawnsley Park Station - 95km

Good Morning World!

Today was the second longest day in succession, and one that might break the legs. Any ride following yesterday would need to be pretty special to match the scenery we saw. Amazingly, it more than delivered. The day started in the most amazing way. Looking towards the ranges to the west, the early morning sunlight bathed everything in a dramatic red hue. Completely blown away.

What a sensational start to the morning!

Heading out of Hawker we had a super smooth run, clipping along at some pretty comfortable speeds. The trails here were nice and forgiving, allowing us to check out the scenery around us. We had a lot of creek crossings, which were fun as we would approach them at a respectable speed and could just blast over them and up the other side.

Somewhat unexpectedly we came across a lavish marble memorial to Douglas Bruce, dating to 1873. Given the size of the tomb, and the effort that would have been required to transport it to such a remote location, I have been surprised that I've been able to find precious little about who Douglas Bruce was!

Tomb of Douglas Bruce

Serious Cycling Begins

We also started getting a few fairly steep climbs and descents. One descent in particular we were warned that it might be best to walk. They could have sign posted it a bit better because I had already ridden half way down by the time I stopped to take some photos. Admittedly the second part of the descent seemed a lot more treacherous than the first part I rode down. Possibly knowing what lay ahead I'd give the descent a bit of a crack, though potentially putting your trip at risk just to say you can ride down a single rocky descent doesn't make a lot of sense.

Tricky rocky descent
Throughout the day the surrounding ranges grew larger in our vision, contrasting against the dark clouds acting as a dramatic backdrop. I think everyone we bumped into along the way felt awestruck by the surroundings. Light would peek through the clouds at various times, highlighting different parts of the ranges, obviously requiring a photo stop!

Impressive scenery like this was around us all day.

Miss V - enjoying the surroundings
Lynskey and Maretta resting..


After lunch was an entirely different matter. About 27km of corrugated roads into a cold head wind. Not fun. I don't think anyone enjoyed this. It was pretty difficult to appreciate the scenery with your eyeballs bouncing around in their sockets. A pity really. It was with some relief we turned off this road onto a nice sealed road. The road was a little on the hilly side of things, but at least it was smooth.

We rolled into Rawnsley Park fairly exhausted and feeling a little beaten up, only to find that there were limited spaces available that would accommodate our tent. Eventually I noticed that one of the campsite's permanent tents towards the top of the hill was missing, and that our tent would find neatly in the gap created by it's absence. We were pretty high up on the hill, but we were still well sheltered from any wind gusts.


Lynskey and Maretta arrive at Rawnsley Park
Always look back from where you've been!

As Rawnsley Park is set up as a tourist resort, I was looking forward to a pretty special meal. Unfortunately I can't say that I was that impressed with what was served up. Dinner consisted of a potato and leek soup that lacked any real flavour, a lasagne for the main course that appeared to only have one paltry layer, and an apple crumble that, to the chef's credit was pretty awesome. Fairly disappointed all things considered. Maybe I'm just spoiled by Miss V's awesome cooking when I'm at home, but I would have expected a chef to be able to serve up a lot better than we received.

Tomorrow is a much shorter day for us, though there is a relatively large amount of climbing. Hopefully we're able to get in early enough to have a bit of a rest and maybe a bit of a look around Wilpena Pound.

Strava data

Outback Odyssey 2015 - Day 2

Mini Mawson 3 - Quorn to Hawker - 95km

Chin Up!

Fighting back the dejection of yesterday, we awoke at 5:30am to face what would likely be our longest, and possibly most challenging day. The night was dry, so we awoke to find our tent had dried. Small blessings I guess. Though that soon changed when some light showers hit while we were eating breakfast. <sigh!> Wet tent pack up again.

Rolling out of Quorn, we had a fantastic tail wind on our back, a very welcome relief after yesterday. The scenery and terrain had noticeably changed from yesterday, with more elevation changes and our views changing from the flattish plains of yesterday to the Flinders Ranges looming large. We experienced the most amazing cycling, and stunning scenery. Lots of photo stops along here resulting in the sag wagon stalking us for a large part of it. Fairly early on during the ride today we decided to take the sealed road option after lunch, which gave us more time to enjoy the morning section as it cut off about 20km off the days total distance.

Entering Warren Gorge

Hugh Proby

Towards the end of Warren Gorge we arrived at the grave of Hugh Proby, an early settler in the region who lost his life not long after arriving during an ill fated creek crossing. We stopped to take a few photos, and to read the inscription on the headstone. This is one of the huge advantages when travelling by bicycle. I can't think of the last time I stopped the car to check out a small road side monument. How much more of our history is whizzing by when we're travelling along the highways? While we were doing this a local reporter from Quorn pulled up to chat to us and take our photo. So Miss V and I might be in the Quorn local paper :)

Exiting Warren Gorge we crossed Willochra creek (the same creek that took Hugh Proby's life) which had quite a decent flow in it, before climbing up to Simmonston, referred to as "the town that never was".
Miss V crossing Willochra Creek. 

Simmonston

Simmonston was surveyed 1872 and construction started on two buildings (a hotel and a general store) but was quickly abandoned. I think places like this give a fantastic insight into the early settlers mindset of rapid expansion and colonisation. On the other hand, it's a little sad thinking that people invested so much effort coming out this far, with very little return on investment.  We spent a bit of time looking at the ruins at Simmonston and admiring the view given the nice vantage point over the valley that we'd just travelled through.

The view from Simmonston

After Simmonston was one of the less exciting places to cycle. The Willochra plains are flat. Very flat. The roads are straight. Very straight. They seem to go on for ever and there's not much in the way of scenery to ease the boredom. Though just to throw some variety into the mix, there were a few corrugated sections to knock your body about the place.

We arrived at lunch, just in time to see unicycler Lindsey leaving. This guy is amazing, taking on the full length of the Mawson Trail on a unicycle takes a lot of courage, not to mention fitness! We sat under the shade and ate our lunch, reaffirming our decision to head up the highway after lunch.

Unicycling under dark skies.

Kanyaka Ruins

As a consequence of taking the sealed road option after lunch, we were able to visit the Kanyaka ruins. These ruins were established by Hugh Proby, whose grave site we visited earlier in the day. At it's peak it housed up to 70 families. I wasn't really expecting a lot, but after cresting the final small hill of the entrance road to get there it was like another world. Perhaps about 10 preserved buildings for us to explore, and a pretty awesome experience.

Kanyaka ruins
Kanyaka ruins

We pulled into the camp grounds at Hawker a little on the tired side, and with fairly gloomy skies overhead.  Space was a little tight, but we found a cozy spot to put the tent up. Miss V booked herself in for a massage, while I caught up with the world on my tablet. From this point on, phone reception was going to be non existent on Optus, so best make the most of it now!


Lynskey and Maretta reach Hawker.

A fantastic dinner was prepared by the local community group, consisting of a vegetable and pasta soup, steak with an assortment of awesome salads for the main course and apple slice with custard for dessert.

Strava data

Friday, 29 May 2015

Outback Odyssey 2015 - Day 1

Mini Mawson 3 - Melrose to Quorn - 75km


Overnight we were treated to a spectacular light and sound show courtesy of mother nature. By the sounds of it very few in the camp got a decent sleep, Miss V and myself included. Unfortunately, this also meant a wet tent to pack up, which is not ideal. One thing that we learnt from last time was that once things got wet, they tended to stay wet.  A quick breakfast of cereal, fruit salad and a cup of tea and we were ready for the start of our adventure.

Lynskey and Maretta ready for action in Melrose.


With a bit of nervousness, we headed out from Melrose into the unknown. I say that I was nervous, since it was on day 1 that my knees went haywire last time. First stop was not far out of Melrose to visit the marker designating the Goyder line. It seem appropriate to stop here since both Miss V and myself work alongside the Goyder institute.

Plaque at Goyder's line.

Mud!

Not far into the ride we were greeted with a long stretch of mud. Cyclocross skills came to the fore as we made our way through. The mud was thick and clayey and quickly clogged up pretty much everything. In hindsight, riding on the partly grassed side of the road, or even walking this stretch may have been the better option, but hey, it was a whole lot of fun! We took a couple of opportunities to stop and clear out any mud along here. A few who weren't quite so careful found that they ripped off their derailleurs. There were a few water taps at morning tea in Wilmington, so most took the opportunity to rinse off the bulk of the mud, Miss V and myself included.

Flithy Lynskey
Flithy Lynskey

After morning tea we had a nice run along Gunyah road towards our lunch stop.  Generally open expanses along here, with the peaks of the Flinders Ranges temptingly in the distance. We arrived at the lunch stop, located near not one, but two, dead animals. Not really ideal, but we managed to find a place to sit that wasn't downwind of them.

Miss V looking happy with her new bike.

Detour

After lunch we were advised that the actual Mawson route was very muddy and it was suggested that we head along the road instead.  Maybe a bit disappointed, but it sounded like a reasonable option given the aches and pains both of us had by now. Fortunately we were (initially) treated to some lovely scenery over some easy undulating countryside. The last 15km however was a hard slog, and to be honest, not much fun. We had a terrible headwind and there wasn't much interesting to look at. On top of this, I could hear poor Lynskey groaning and grinding as the remnants of the mud circulated on her drive train. During this section I was having thoughts along the line of "why am I doing this?". I will confess that touring style riding is not really my favourite thing. I can't really put my finger on why, but this stretch of todays ride seemed to back up this point of view.  

To add insult to injury, we were hearing that those that chose to take on the unsealed route after lunch (ie the true Mawson route) encountered little in the way of mud, and were fairly shielded from any of the headwind.

Lynskey and Maretta arrive in Quorn.
Arriving at Quorn, our tent was put up and I made a decent effort to clean and lube the drive train ready for tomorrow. Hopefully having a nice smooth running bike in the morning will perk up my spirits.

Dinner at Quorn was nice vegetable soup, followed by a main course of roast chicken, roast potato, roast pumpkin, carrots and beans. All good stuff to fuel us up for epic ride we have in store tomorrow. Have to love the food put on by the local communities!

Strava data


Outback Odyssey 2015 - Day 0


So Miss V's plan to get me back to do Outback Odyssey has been successful, despite my initial reservations due to the pain and suffering endured last time. That said, there were definitely happy memories too, which on the balance of things, far out weighed the negatives which I've tended to focus on. The Outback Odyssey also marks an anniversary of sorts. My blog has been going for two years! I probably haven't updated it as much as I would have liked, but I've enjoyed putting my thoughts out there and have received good feedback

Planning

In the last two years I think I managed to work out what was the cause of the knee issues and, as posted previously, a new bike was built up with the intention of taking it to Outback Odyssey. So there was a fair amount of optimism around completing he journey this time. Different from last time, we decided to tackle he final stretch, Melrose to Blinman, also referred to as the Mini Mawson 3. Many that we'd spoke to referred to the final section as being the best one as far as scenery was concerned, so I was looking forward to what the next five days would bring.

New bike for the Outback Odyssey - Mini Mawson 3

During the lead up to the Odyssey most things seemed to be running to plan as far as getting things organised was concerned.  Things seemed to be running so smoothly that I had to wonder what we were missing. A final flurry of activity on the final night and we were all set to go the next morning.

Arrival

The drive to Melrose was an adventure in itself. Our original plan was to get there early so that we could head out for a blurt around the trails. We left more or less on time, according to the schedule that we had set ourselves, an amazing achievement in itself. However, a series of sub optimal navigation choices coupled with a train stopped across a crossing, and sheep across the road meant we got into Melrose much later than expected. Hopefully we'll have a short play on the trails once we get back to Melrose at the end of the Odyssey.

We found a nice spot for our tent, and got all our gear ready to go for our big adventure. We made our way to the Melrose Institute for dinner a little early, allowing us to catch up which a bunch of old friends from previous tours. The food was fantastic, consisting of three courses:  Pumpkin soup for starters,  Roast beef with peas, carrots, roast potato, roast pumpkin and gravy for the main course, and Apple crumble with ice cream for dessert. If the previous Outback Odyssey was any indication, we're definitely not expecting to go hungry!

So, the riding for us starts early tomorrow, heading into Quorn along some (apparently) fun terrain. Feeling a little bit nervous, and a little bit excited and hoping it all goes smoothly. Fingers and toes crossed!

Saturday, 16 May 2015

I fixed something!

Crazy, I know..  I'm capable of putting things back together, and not just destroying things.

My last two cyclocross races were notable for all the wrong reasons, namely a god awful creaking noise coming from my bike. When the issue first arose, I thought it must be pedal related since it only happened when I pedalled. A liberal application of grease in the pedal bodies and I assumed all would be well. The first race after this "fix" showed that my optimism was poorly placed, as the creak was still there, and had seemingly brought an entire choir of his or her creaking friends. I was at a bit of a loss and utterly annoyed, and so I put the bike away and just wanted to forget about the whole thing!

After a few days, I had a lightbulb moment; the noise only seemed to happen when I had my race wheels on the bike. I quick test ride around the park with my commuting wheels on the bike gave me no annoying creaking noises. Eureka!  Turning my attention to the race wheels, I pulled the quick release skewer out to start disassembly. I didn't really have to do much else as once the skewer was removed, the hub and cassette fell off. The problem had revealed itself! As much as I'd love to claim that the axle broke due to an over abundance of power coming out of my legs, I think we can put this one down to a design flaw.

The problem identified.

The entire wheelset had cost me about $300 a number of years ago, so any fix needed to be fairly economical. That said, I couldn't bear to see a fairly solid set of wheels go to waste due to something as trivial as a broken axle. Some work was done trying to source a reasonably priced replacement, though being an older, and possibly less popular wheelset, there didn't seem to be much available.

Some research showed that the hubs used in the Easton EA50 series wheels were similar in many respects to the more commonly available Novatec hubs. There were none that were exactly the same however, but they were similar enough to make me wonder if I could use one to repair my poor old Easton wheel. My suspicion is that Easton have taken two different hub designs from Novatec and custom made an axle that allows them to blend the two designs together. I found two hubs that could potentially fit the bill. One with a thinner axle, which would fit the non-drive side of the Eastons, and one with a thicker axle that would fit the drive side of the Eastons. To get either of them to work however, I would need to swap out at least one bearing.

I decided on the thicker axle variant, partly because it was on special at BDop, but also because I figure a bigger axle is probably a good thing to have in a wheel. As an added bonus, the on special hub also came with Novatec's Anti Bite Guard (ABG) freehub which will (allegedly) stop the cassette gouging out channels in the aluminium freehub body.  It was possibly a little more than I was hoping, but still cheaper than if I'd purchased OEM Easton parts, especially once shipping was taken into account.

Donor hub - Novatec 482SB-SL

Disassembly was a fairly simply affair, especially given the Easton hub had practically self-disassembled. Taking apart the Novatec hub was also a relatively painless exercise, though it required more rubber mallet than I'm used to with the Easton hubs.


Disassembly of the Novatec hub in progress
Novatec axle, spacer and bearing removed, ready to be transplanted
Bearing to be removed and replaced from the Easton wheel
Finished product. Woo shiny. 
Job done!

It still needs to be tested, though it all seems to be holding together. It probably remains to be seen whether the freehub alignment is correct. Amusingly, in frustration, I've gone out and purchased a new set of wheels for my CX bike, so it's likely that these wheels might just sit idle in the short term. Hopefully I can find a use for them, since it would seem a shame to go to the effort to fix them and not use them.

Thanks for reading! :)


Sunday, 15 February 2015

Project - Giant TCR C2 Di2

Introduction

Ever since I'd heard about electronic gears, I've been intrigued by them. No, we're not talking about the early incarnations of Shimano Di2, I'm talking about the even older Mavic Zap system. Of course, the pricing put them well out of each for me, so I never had an opportunity to even try them out. That said, reviews seem to indicate that I didn't miss out on much.

Mavic Zap Groupset. Possibly made out of Unobtainium
What seemed like a cool idea to me seemed to fade away into obscurity until Shimano entered the game with their DuraAce Di2 setup. Predictably, this too was out of reach price-wise, but the product was far more polished and the overall uptake was much better than the Mavic systems. Even more interesting was the announcement that there was likely to be an Ultegra level electronic gear set in the future.

Finally Ultegra Di2 was announced and while it was still fairly expensive, it was temptingly on the verge of being affordable.  At about the same time as Ultegra Di2 was becoming more common, I clocked up 40 years of living. I'd long had a thought that I'd treat myself to my dream bike, a Pinarello, for the occasion. Another option kept dancing around in my head, that being to upgrade my current bike (2005 Giant TCR C2) to Di2.  So the options seemed to be either a traditionally geared and cabled Pinarello, or upgrade my current steed. Fortunately, I was able to combine both of these things, and I was soon the proud owner of a beautiful Di2 equipped Pinarello. See here for the story.

As time has progressed the price of Ultegra Di2 has dropped, and my continued use of Di2 on my Pinarello has meant that I've had a chance to appreciate its benefits. So a reoccurring thought was whether I could, or even should, upgrade my Giant to Di2 as well. Most of the negatives around the plan were centred about whether it was just throwing money around for no good reason (particularly at a time when job security was a little fluffy). Most of the positives amounted to "Dude! How cool would it be?" When the opportunity to pick up a cheap secondhand Di2 groupset came along, the scene was set. My Giant was going electronic. This blog post is a bit of a journal intended to document the process.

The Bike

In 2006, having been working at Aquaterra for a number of years, I'd saved up a little bit of money. While I'd always been enthusiastic about cycling, I found myself not riding anywhere near as much as I would like. To encourage me to ride more I decided to treat myself to a new bike. Carbon Fibre, Ultegra gears, far more bike than I needed. This bike has been the catalyst for my renewed passion for cycling, and has been my loyal companion through countless rides; seeing me through a number of community rides and underneath me when I dipped my toe into the weird and wonderful world of bicycle racing. To say I love this bike to bits would be an understatement! Despite having upgraded to my Pinarello, jumping onto this bike still brings a smile to my face.  A chance to upgrade it, for whatever reason, just felt like the right thing to do.


My awesome 2005 Giant TCR C2

The Donor Bike

I guess this is a story of one persons misfortune becoming another persons gain. An advertisement on the Port Adelaide Cycling Club's forum from a user showed that they were looking to sell their crashed Di2 equipped road bike. Initially I wasn't interested as the price was possibly a little higher than I was willing to pay for a secondhand groupset. A drop in price however saw me jump at the chance to pick it up. 

A few inquiries and I was soon the owner of a somewhat worse for wear Cannondale SuperSix frame.

In good condition, this would likely be someones pride and joy. Crashed into a carport, sadly, it becomes a parts donor. I picked this up for $750, which seemed like a reasonable price for a fairly low use groupset, in excellent condition.  Fortunately for me, the Cannondale used an external battery, rather than the internal battery that my Pinarello uses, which meant that I could use it on my Giant. One issue that I faced during the build was that the Cannondale is a much larger frame than my Giant. Those long cables needed to be routed and stashed somewhere!

Cannondale Supersix EVO - not quite pristine

Deconstruction

The first step in this journey was to remove all the Di2 components from the Cannondale frame. This should have been a relatively straight forward process, basically unplug, unbolt and remove. With most of the frame stripped of components and wiring, I was nearly done. Unfortunately though, I managed to turn this straight forward process into a mini drama by breaking the end of my allen key inside a bolt head. Nice one. I describe the level of profanity used at this point as "extreme".

Having removed all of the components, I gave them all a little bit of a clean to remove the small amount of road grime that had collected on the components.

We were ready to go!

At the start of the Christmas holidays, I put the Giant onto the workstand, laid out all the parts and continued to ponder how I might mount the battery. This had been the main worry, since the Giant has no mounting points for a Di2 battery.

Eventually I decided to buy extras parts to mount the battery behind the water bottle cage on the downtube and move the bottle cage on the seat tube upwards. Fingers crossed this would work! Order placed online, time to wait. In the meanwhile, I figured I could do the bulk of the work.

For whatever reason the stripping of the Giant of parts was filled with nervousness. I'm not sure why, but it always worries me when I'm taking apart a bike (especially mine!) that is running perfectly. After procrastinating for an hour or two I marched into the garage grabbed a allen key and started taking off parts. In no time flat I had a frame devoid of any running gear. My poor Giant looked so naked.

My Giant..   ready to be reborn.

Rebuilding 

As my Giant frame pre-dates Di2 componentry, there was a small, but possibly critical, piece that needed to be ordered. Before I could obtain it though, I needed to find out what it was called! It turns out that it's called a "Support Plate".

This small part protects the frame from the support bolt, which is intended to allow the front derailleur to brace against the frame. Obviously, pressing a bolt directly onto a carbon tube isn't a good idea, so this is the work around. The Cannondale has a slightly extended derailleur mount to take care of this which is a nice, elegant solution. To my surprise, this seemed to be a very difficult part to source. I finally found them at SJS Cycles in the UK. After nearly a month of waiting, it finally arrived.
Vital component.

So the process began, and components started finding their way onto my soon to be resurrected Giant. As is the norm for me, I started with the low hanging fruit just so that it felt like I was making progress. So the front and rear derailleurs were attached, as were the brake/shifter levers and brake calipers.
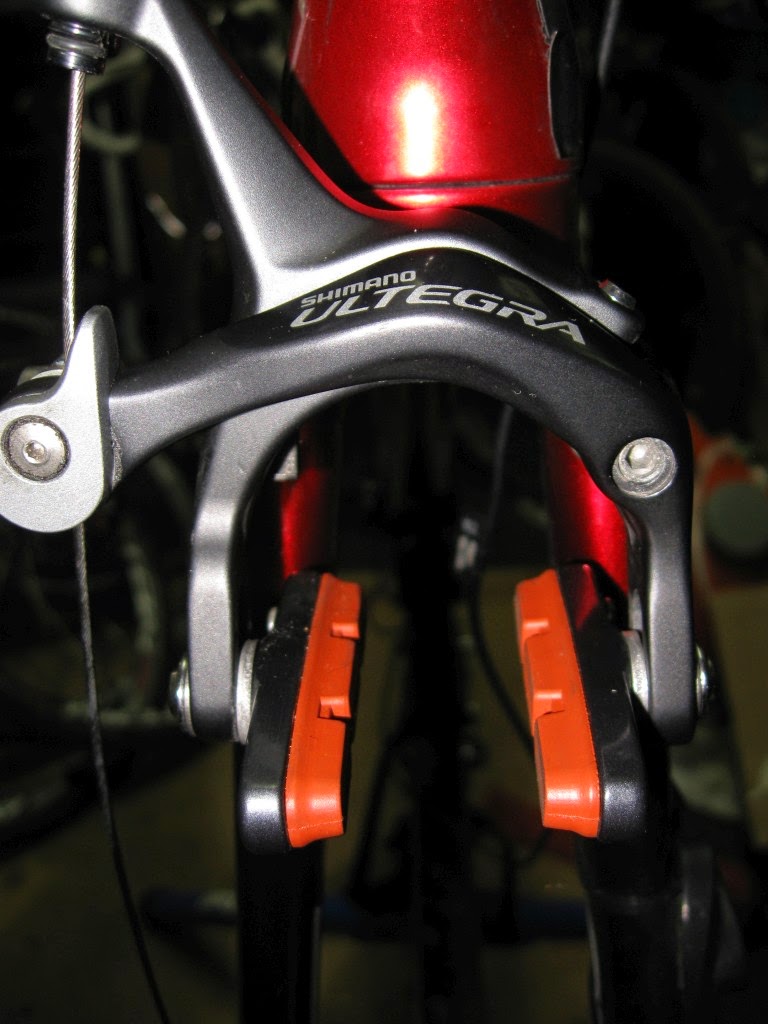
New brake Calipers
Front Derailleur Attached
New Rear Derailleur Attached
New Shift Levers
For quite a while I was hanging onto a fancy Hope bottom bracket, waiting for an appropriate opportunity to install it. This was the opportunity! Realistically there was no real reason to install it as my old bottom bracket was running fine and smooth, but this this one is red! Of course we all know red goes faster.

Shiny Hope Bottom Bracket
While all this was going on the Di2 battery holder and bottle cage mount arrived, allowing me to install the battery. It's a snug fit, but it's all in there.

Battery installed underneath the bottle cage
Connecting up all the wires, a quick test was performed to make sure all the components worked. With everything checking out okay, I got onto the bit I had been dreading the most, organising all those cables!

Cable Routing

Prior to starting this project, one of the biggest unknowns that I assumed I would have, would be the routing and securing of the cables.  Since the frame pre-dates Di2 by a number of years, this pretty much turned out to be the case. Quite a bit of time was spent head scratching and pondering how and where a cable should or could go, and what to attach it to once it was in place. The Di2 specific cable covers helped a little with this, but were of little use when trying to route cables from the top side of the down tube to the underside of it (eg, from the battery and the front derailleur to the junction box on the base of the bottom bracket).  Judicious use of cable ties tended to solve these issue, though clearly a Di2 specific frame, especially with with internal routing, wouldn't have any of these problems.

Cable Routing. Mini nightmare.

Finishing Up

With all the big stuff out of the way, all that was left to do is check the gears, check the position of the brake levers and wrap the bar. A bit of a test ride confirmed that everything was running super smoothly.

The Finished Product

Wrap Up

So we're all done and dusted. I'm now the proud owner of a Di2 equipped Giant TCR C2. All up I'm pretty happy with the result. It rides as smoothly as previously, but with the positive and crisp shifting that comes through Di2.

To a certain extent I'm glad that I didn't choose this path over getting my Pinarello, not least of which because I wouldn't have my awesome Pinny, but also because the bike would have been off the road for much longer than I would like while all the messing about to get things fitted happens.

I guess questions that might crop up are whether it was worth it, and whether I'd do it again. To both of those, I'd answer that I'm not really sure. It's been a bit of a fun adventure at times, and yet a bit of a nightmare in others. An old frame with internal routing I suspect would be far easier to deal with than one with external routing like this one.

If anyone is thinking of heading down a similar path and needs more information, send me a message and I'll try my best to help.

Thanks for reading! :)


Thursday, 5 February 2015

I made something!


Project: Lynskey

I have always imagined that if I were to build my own bike, it'd probably be some exotic road bike, since that's generally what I prefer to ride. However, with Miss V and myself planning on doing another leg of this years BikeSA Outback Odyssey later in the year both of us were thinking that new bikes might be the order of the day. While our 26" dual suspension bikes handled things okay last time, we thought things could be a little more pleasant for us with some smooth rolling hardtail 29ers. I initially had a few options in mind, Focus and Scott had some likely candidates to name a couple.

Something that kept cropping up and piquing my interest was a Lynskey titanium frame on special. Did I have the skills to build my own bike? Maybe. Could I maintain interest long enough to complete the project on time? Possibly. Eventually I bit the bullet and started to order all the bits that I thought I'd need. One by one I watched as all the components and tools arrived and were promptly placed in a pile of goodies, ready for the start of construction. With excitement building I (perhaps foolishly) posted a photo of the pile of goodies on Facebook, which produced a huge amount of positive feedback. No backing out now!


Task: Turn this into a bicycle.

I started fairly slowly, taking care of the low hanging fruit first, such as mounting tyres to wheels, installing the seat post and similar trivial things.  The drive train and associated cabling found its way onto the frame in short order. I guess up to this point I was making good progress since I was concentrating on tasks that I was fairly familiar with from working with my other bikes.

As parts were being attached I could get a bit of a feel for what the final product was going to look like, and I liked what I was seeing.

Nice solid wheelset.
Ridiculously complicated seatpost.
Eventually, I had to tackle some of the more difficult tasks though. I guess when I say "more difficult" I really mean tasks that I've never performed before, primarily installing the headset cups and to a lesser extent cutting the steerer tube. 

Installing the headset proved to be more troublesome than anticipated since the headset press that I purchased wasn't entirely suitable. Nevertheless, I improvised a little and eventually got them installed. With the headset installed the forks could be put in place and work start on setting up the cockpit and controls. I think it was during this phase that things really started sinking in. I could stand back and think   "I've made my own bike!"


Getting there!

My final tasks were to cut the steerer tube, install the starnut, and tighten everything down. A few final adjustments and I tentatively rolled my new Lynskey out the door for a gentle spin in the park across the road.  I had a rideable bike! No way!

Looking pleased with myself
Back from my short test ride.

One task that I decided to get an expert to take care of was trimming the brake lines and bleeding the brakes. A quick email to the folks at BMCR and it was all sorted. I figured paying Pete to work his magic on the brakes was by far a better and cheaper option than an extended stay in hospital due to failed brakes!

So there you have it...  In about a week and a half of part time work I turned a pile of parts into an awesome bike, put together with components researched and picked by me. In my humble opinion, it looks pretty damn good to boot!

The initial rides that I have had on it have shown it to be much easier to keep rolling compared to my dual suspension bike. Somewhat expected, but good to have validation that the initial point of the exercise has been achieved.

The finished product, out in the wild.

For those that are interested, here are the specifications for the build.

Specifications:
  • Frame - Lynskey MT29, size small
  • Fork - Rockshox SiD RCT3, 100mm travel, 15mm through axle.
  • Drive train - Shimano XT 
  • Brakes - Shimano XT
  • Wheels - Shimano XT hubs laced to Mavic XM319 rims
  • Tyres - Schwalbe Rocket Ron
  • Seat post - Crank Brothers Cobolt 3
  • Saddle - Sells Italia SLR
  • Pedals - Crank Brothers Candy 3
  • Stem - Specialized
  • Handlebar -Crank Brothers Cobolt 3
  • Grips - Crank Brothers Iodine
  • Headset - Cane Creek 10 Series

Learnings:
  • Research every component you plan to use, even the seemingly simple stuff. 
  • Take your time. Don't be afraid to down tools and have a think about how the task at hand is supposed to progress. 
  • Youtube is fantastic for bicycle maintenance and building tutorial videos.
  • Have fun! Bicycles are supposed to be fun!
If I were to undertake this process again, I think I would more than likely revisit the seat post and headset. The headset is a lower specification model which uses an injection molded crown race. Hopefully I can upgrade that to something more durable in the future. The seat post, while nice to look at, includes a clamp seemed to be overly complicated, and a bit fiddly to set up.

Any questions, shoot me a line and i'll try my best to answer!  Thanks for reading! :)